Master the Name of Camera Angles: 10 Shots to Elevate Your Social Video
Discover the name of camera angles that transform your content. Our guide covers 10 essential shots with pro tips for social media, ads, and more.
Have you ever wondered why some videos just feel more powerful, professional, or engaging than others? The secret isn't always expensive gear; it's the strategic use of camera angles. Each shot has a psychological impact, subtly shaping how your audience perceives the subject and the story. Understanding the name of camera angles and their specific functions is one of the fastest ways to elevate your content from amateur to expert. In a world of endless scrolling, mastering this visual language helps you stop thumbs, convey emotion, and drive action. For businesses aiming to maximize growth, employing powerful visual storytelling through professional video is crucial for engaging audiences effectively.
This guide breaks down 10 fundamental camera angles, providing clear definitions and, more importantly, actionable tips for using them in your social media content, ads, and brand videos. We'll move beyond theory and give you practical scenarios for TikTok, Instagram Reels, and YouTube Shorts, so you can start creating more dynamic and effective content today. Let's frame your success.
1. Eye Level Shot
The eye level shot is arguably the most fundamental and relatable of all camera angles. By positioning the lens at the same height as your subject's eyes, you establish a direct and neutral connection with the viewer. This angle mimics how we interact with people in real life, creating a sense of equality and authenticity. Because it feels so natural, it’s a go-to for building trust and delivering information clearly.
Think of a TikTok influencer sharing a personal story directly into their phone or a CEO delivering a professional testimonial for a LinkedIn video. The eye level shot makes the audience feel like they are part of a one-on-one conversation, removing any sense of intimidation or inferiority. This is why it’s a cornerstone for vloggers and educators building a personal brand.
Creative Tips for Using an Eye Level Shot
While it's a "default" angle, you can make it dynamic. Combine it with subtle camera movement, like a slow push-in, to heighten emotional impact during a key message. Alternatively, use it as the foundational shot in an edit, cutting to more dramatic angles (like a high or low angle) before returning to eye level to ground the viewer.
Pro Tip: Use the eye level shot for A/B testing your core message. Since the angle itself is neutral, you can get a clearer read on how your script, delivery, and background visuals are performing without the psychological influence of a more stylized angle.
When to Use This Angle:
- Tutorials & How-To Content: Perfect for establishing expertise and guiding viewers through a process in a clear, friendly manner.
- Vlogs & Personal Updates: Builds a strong, personal connection with your audience.
- Brand Testimonials: Adds a layer of authenticity and trustworthiness to customer or employee stories.
- Interview Setups: Standard for creating a balanced, conversational feel between the interviewer, subject, and audience.
2. Low Angle Shot
The low angle shot is a powerful tool for shifting perspective and a key technique when learning the name of camera angles. By positioning the camera below your subject’s eye level and aiming upward, you instantly make them appear more dominant, powerful, and significant. This angle psychologically elevates the subject in the viewer's mind, making them seem larger than life. It’s a classic cinematic technique for establishing authority or heroism.
Consider a TikTok video showcasing a "final boss" outfit or a motivational speaker filmed from the edge of a stage. The low angle shot makes the subject feel imposing and aspirational. For direct-to-consumer brands, this angle is perfect for a product reveal, making an ordinary item feel premium and monumental. It grabs attention by breaking the standard eye-level view, signaling to the audience that what they are seeing is important.
Creative Tips for Using a Low Angle Shot
To maximize impact, combine a low angle shot with slow-motion to create a heroic "hero moment," especially for action or sports content. Be mindful of lighting; position your key light to avoid creating unflattering shadows under the chin and nose. This angle isn't for every scene, so use it strategically to emphasize key moments rather than as a default, which can feel overly dramatic if overused.
Pro Tip: Use a low angle to position a brand as premium or authoritative. For a new product launch, a slow, upward-tilting low angle shot can build anticipation and present the item as a must-have, high-value solution.
When to Use This Angle:
- Product Reveals: Makes a new product look impressive, valuable, and highly desirable.
- Motivational Content: Empowers the speaker and makes their message feel more impactful and inspiring.
- Action & Sports Highlights: Accentuates the skill and power of athletes during peak performance.
- Transformation Videos: Shows off a final "after" look with confidence and authority.
3. High Angle Shot
The high angle shot is a powerful narrative tool where the camera is positioned above the subject, looking down. This perspective psychologically diminishes the subject, making them appear vulnerable, weak, or small. By placing the viewer in a dominant position, this angle can be used to establish a power imbalance, convey a sense of helplessness, or provide a broader view of the environment. It’s a key technique among the different name of camera angles for shaping an audience's emotional response.
Consider its use in problem-solution advertising, where a high angle shot frames the "before" state, showing someone struggling or overwhelmed. In documentary-style storytelling, it can emphasize a subject’s vulnerability during a personal confession. It’s also the foundation of popular top-down content like recipe videos and flat-lay product displays, shifting the focus from emotion to clear, objective information.
Creative Tips for Using a High Angle Shot
To make this angle more impactful, pair it with music that reinforces the intended emotion, whether it’s sadness, confusion, or even tranquility in a lifestyle shot. A powerful narrative device is to transition from a high angle (showing the problem) to an eye level or low angle shot (showing empowerment after the solution). This visual journey can make your story’s resolution feel much more earned and satisfying.
Pro Tip: For product-focused content, a high angle shot, especially a flat-lay, removes emotional distractions and allows the product to be the hero. This is perfect for Instagram or Pinterest posts where aesthetic clarity is key to stopping the scroll and driving interest.
When to Use This Angle:
- Problem-Solution Narratives: Ideal for showing the "problem" phase, highlighting a character's struggle before a solution is introduced.
- Transformation Content: Use for the "before" shot to visually underscore the need for change.
- Vulnerable Storytelling: Adds emotional weight when a creator is sharing a difficult or personal experience.
- Product & Food Content: The go-to for overhead flat-lays and recipe tutorials, providing a clean, comprehensive view.
4. Dutch Angle (Canted/Tilted Shot)
The Dutch angle, also known as a canted or tilted shot, is one of the more expressive names of camera angles in a filmmaker's toolkit. It involves tilting the camera so the horizon line is no longer level but diagonal. This immediately throws off the viewer's sense of balance, creating powerful feelings of disorientation, tension, unease, or even excitement and energy, depending on the context. Its unnatural composition is a deliberate choice to signal that something is wrong or highly dynamic.
This angle is a staple in thrillers and action movies to build suspense, but it has found a new home in high-energy social media content. Think of a dynamic fitness instructor's TikTok showcasing an intense workout or a music video cutting to a tilted shot during a powerful chorus. The Dutch angle grabs attention by disrupting the visual norm, making it a powerful tool for scroll-stopping content on Reels and TikTok.
Creative Tips for Using a Dutch Angle
This angle should be used with intention, not as a default. A slight tilt (around 15 degrees) can introduce subtle psychological tension in a dramatic scene, while a more aggressive tilt (30-45 degrees) works perfectly for chaotic action sequences. Combine it with fast cuts and energetic music to amplify the effect, or use it as a disorienting transition between two stable, eye-level shots.
Pro Tip: In product videos, use a quick Dutch angle during a launch announcement or a "big reveal" to inject a sense of excitement and urgency. The sudden visual shift can make the product feel more dynamic and impactful.
When to Use This Angle:
- High-Energy Content: Perfect for fitness, dance, or sports videos to match the on-screen action.
- Thrillers & Suspenseful Scenes: Instantly creates a sense of unease and signals that something is wrong.
- Music Videos: Adds a stylistic, energetic flair that complements the rhythm and mood of the song.
- Scroll-Stopping Hooks: Use a tilted shot in the first 1-2 seconds of a Reel or TikTok to make viewers pause and wonder what's happening.
5. Over-the-Shoulder Shot
The over-the-shoulder shot is a staple for creating dynamic conversations and establishing relationships between subjects. By positioning the camera behind one person to film another, you place the viewer directly into the scene. This angle shows the back of one subject's head and their shoulder in the foreground, creating a natural frame that adds depth and context to the interaction. It’s an effective way to guide the audience's point of view and make them feel like a participant in the dialogue.
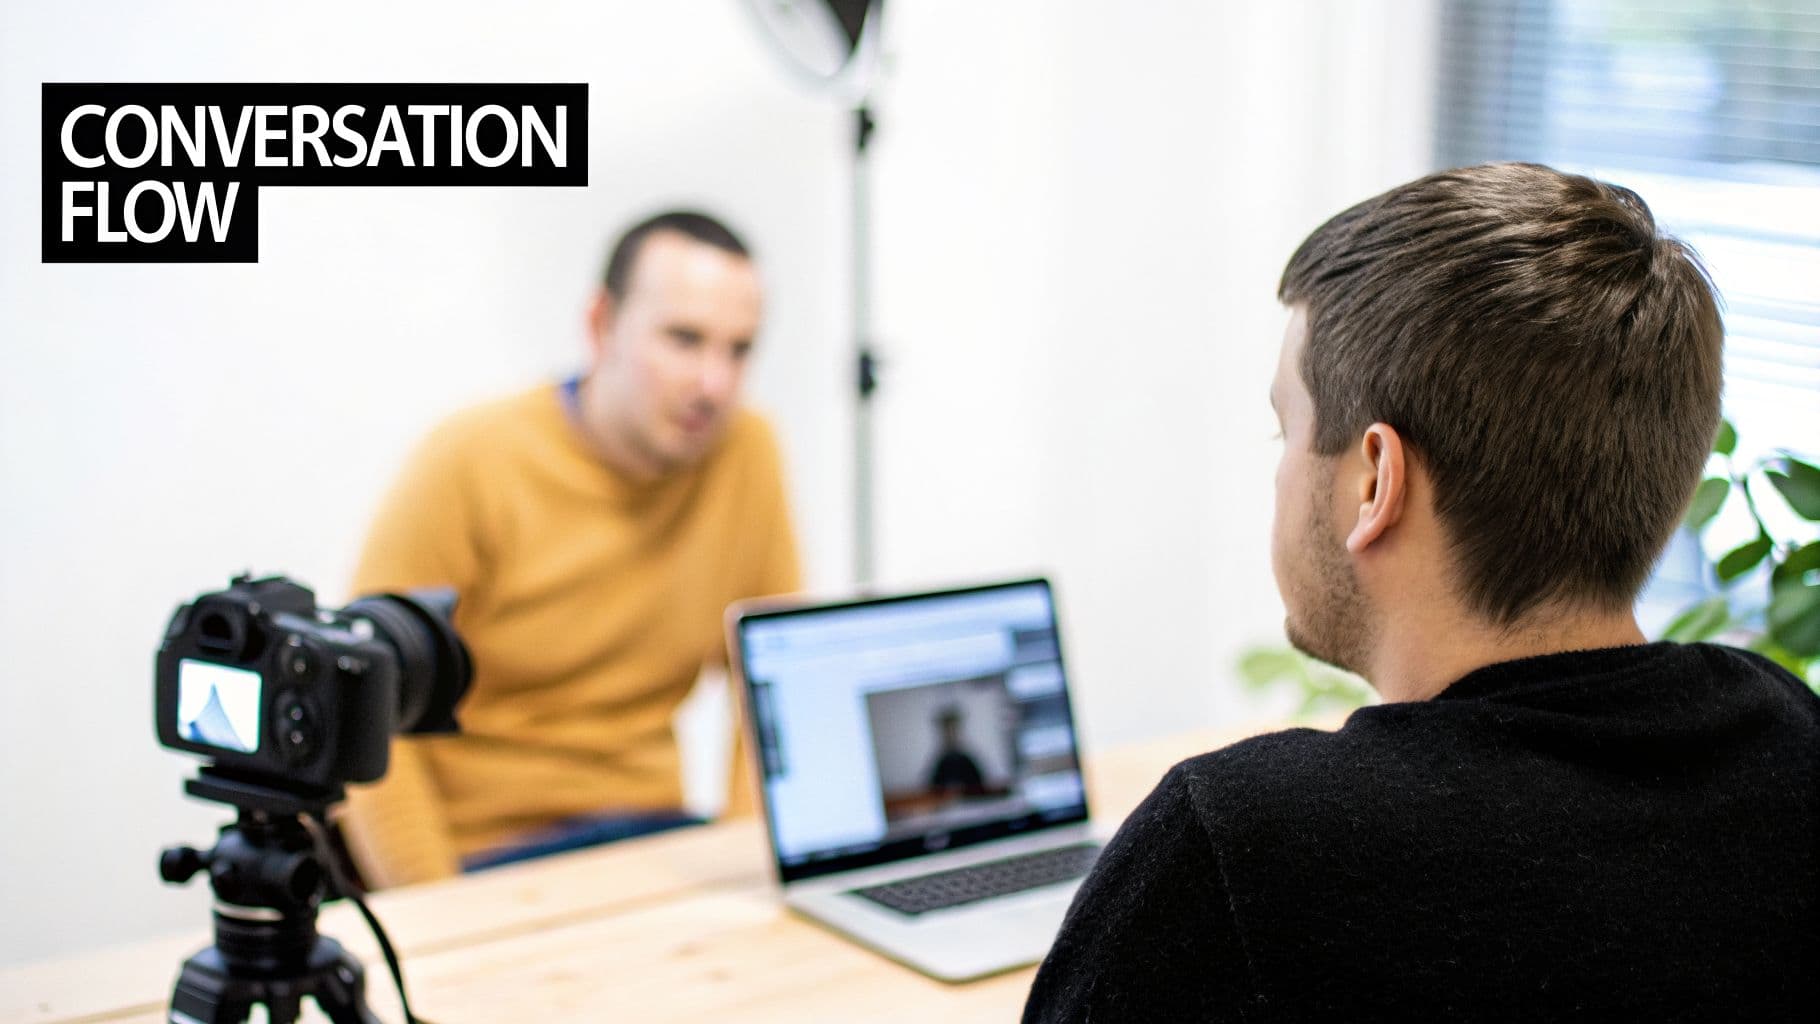
This shot is a cornerstone of interview-style content, from professional podcasts to customer testimonial videos. When you see two people debating a product's features or a coach guiding a client, the over-the-shoulder perspective immerses the viewer in the exchange. It’s a simple yet powerful tool among the different names of camera angles for making multi-person content feel connected and coherent.
Creative Tips for Using an Over-the-Shoulder Shot
To create a balanced conversation, film both subjects with their own over-the-shoulder shots and cut between them. This is known as shot/reverse shot. Keep the subject in the foreground slightly out of focus to draw the viewer's eye to the person speaking. For reaction videos, this angle is perfect for showing both the content and the creator's real-time response in a single, engaging frame.
Pro Tip: During an interview, capture the entire conversation from both over-the-shoulder angles without stopping. This gives you complete coverage in the edit, allowing you to cut away from the main speaker to show the interviewer's listening reactions, which adds a layer of authenticity and engagement.
When to Use This Angle:
- Interview & Podcast Content: Establishes a professional, conversational flow and makes it easy to edit dialogue.
- Product Comparison Videos: Perfect for showing two people debating the pros and cons of different items.
- Coaching & Mentorship Content: Places the viewer in the student's perspective, making the advice feel more personal.
- Reaction & Unboxing Videos: Captures both the product and the creator’s genuine reactions in one cohesive shot.
6. POV Shot (Point of View)
A POV (Point of View) shot is one of the most immersive names of camera angles, placing the viewer directly into the character's or subject's perspective. It shows the world exactly as they see it, making the audience an active participant rather than a passive observer. This technique creates a powerful sense of presence and personal experience, forging an immediate connection by answering the question: "What is it like to be them?"
This angle is dominant in social media, from first-person product unboxing videos where you feel like you're opening the package yourself, to viral TikToks simulating a date. The POV shot puts the viewer in the driver’s seat, making the content feel less like a performance and more like a personal memory. It is a fundamental tool for creators looking to generate high engagement and relatability.
Creative Tips for Using a POV Shot
To make your POV shot feel authentic, focus on smooth, natural camera movement. Avoid jerky motions unless you're intentionally showing a chaotic scene, like running or a sports activity. Pair the visual with strong sound design, such as breathing or footsteps, to deepen the immersion. For tutorials, this helps the student feel like they are the one performing the action.
Pro Tip: When demonstrating a product, a POV shot makes the viewer mentally rehearse using it. They see their own hands (or what feels like their hands) interacting with the item, which can significantly influence their desire to purchase. It’s a direct line to the "try before you buy" mindset.
When to Use This Angle:
- Product Demonstrations: Lets the viewer experience the product firsthand, from unboxing to usage.
- Tutorials & How-To Content: Puts the learner directly in the action, whether they're following a recipe or a software guide.
- Immersive Storytelling: Perfect for creating suspense, empathy, or excitement in short narratives.
- Gaming & Sports Content: Standard for showing gameplay or action from the player’s perspective.
- Social Media Trends: Ideal for "get ready with me" (GRWM), day-in-the-life, or interactive skits.
7. Wide/Establishing Shot
The wide shot, often called an establishing shot, is the angle that gives your audience immediate context. It captures a broad view of the entire scene or location, answering the viewer's fundamental questions of "where?" and "when?" before any action begins. This powerful tool sets the tone, mood, and scale of your story from the very first frame, making it a cornerstone of cinematic storytelling and a key part of any content creator's visual vocabulary.
Consider a travel vlog that opens with a sweeping drone shot of a coastline or a real estate video that begins with a full view of a property at sunset. These shots don't just show a place; they sell a feeling and a promise. By orienting the viewer, you make the closer, more detailed shots that follow feel grounded and meaningful. This is a crucial name of camera angles for creators who want to build a world around their subject.
Creative Tips for Using a Wide/Establishing Shot
While its primary job is to provide context, a wide shot can be made more engaging. Adding slow, subtle movement like a pan across a landscape or a gentle push-in towards a building can maintain viewer interest and create a more professional feel. This angle is perfect for showcasing impressive environments or establishing credibility by revealing an entire workspace or studio.
Pro Tip: Don't let your establishing shot overstay its welcome. Use it to set the scene for 3-5 seconds, then cut to a medium or close-up shot to connect with your subject. The wide shot hooks them, but the closer shots keep them invested.
When to Use This Angle:
- Travel & Vlog Content: Essential for opening sequences to showcase a new destination and create a sense of adventure.
- Real Estate & Property Tours: Immediately establishes the scale, setting, and curb appeal of a home or commercial space.
- Office & Workspace Videos: Builds brand transparency and credibility by showing off your team's environment.
- Event Coverage: Captures the energy and scale of a conference, concert, or gathering before diving into specific moments.
8. Close-Up Shot
The close-up shot is a powerful tool for creating intimacy and emphasizing detail by tightly framing a subject or object. This classic entry in the list of camera angle names fills the screen, forcing the viewer's attention onto a specific element, whether it's the raw emotion on a person's face or the intricate texture of a product. It eliminates distractions and creates a direct, focused point of connection.
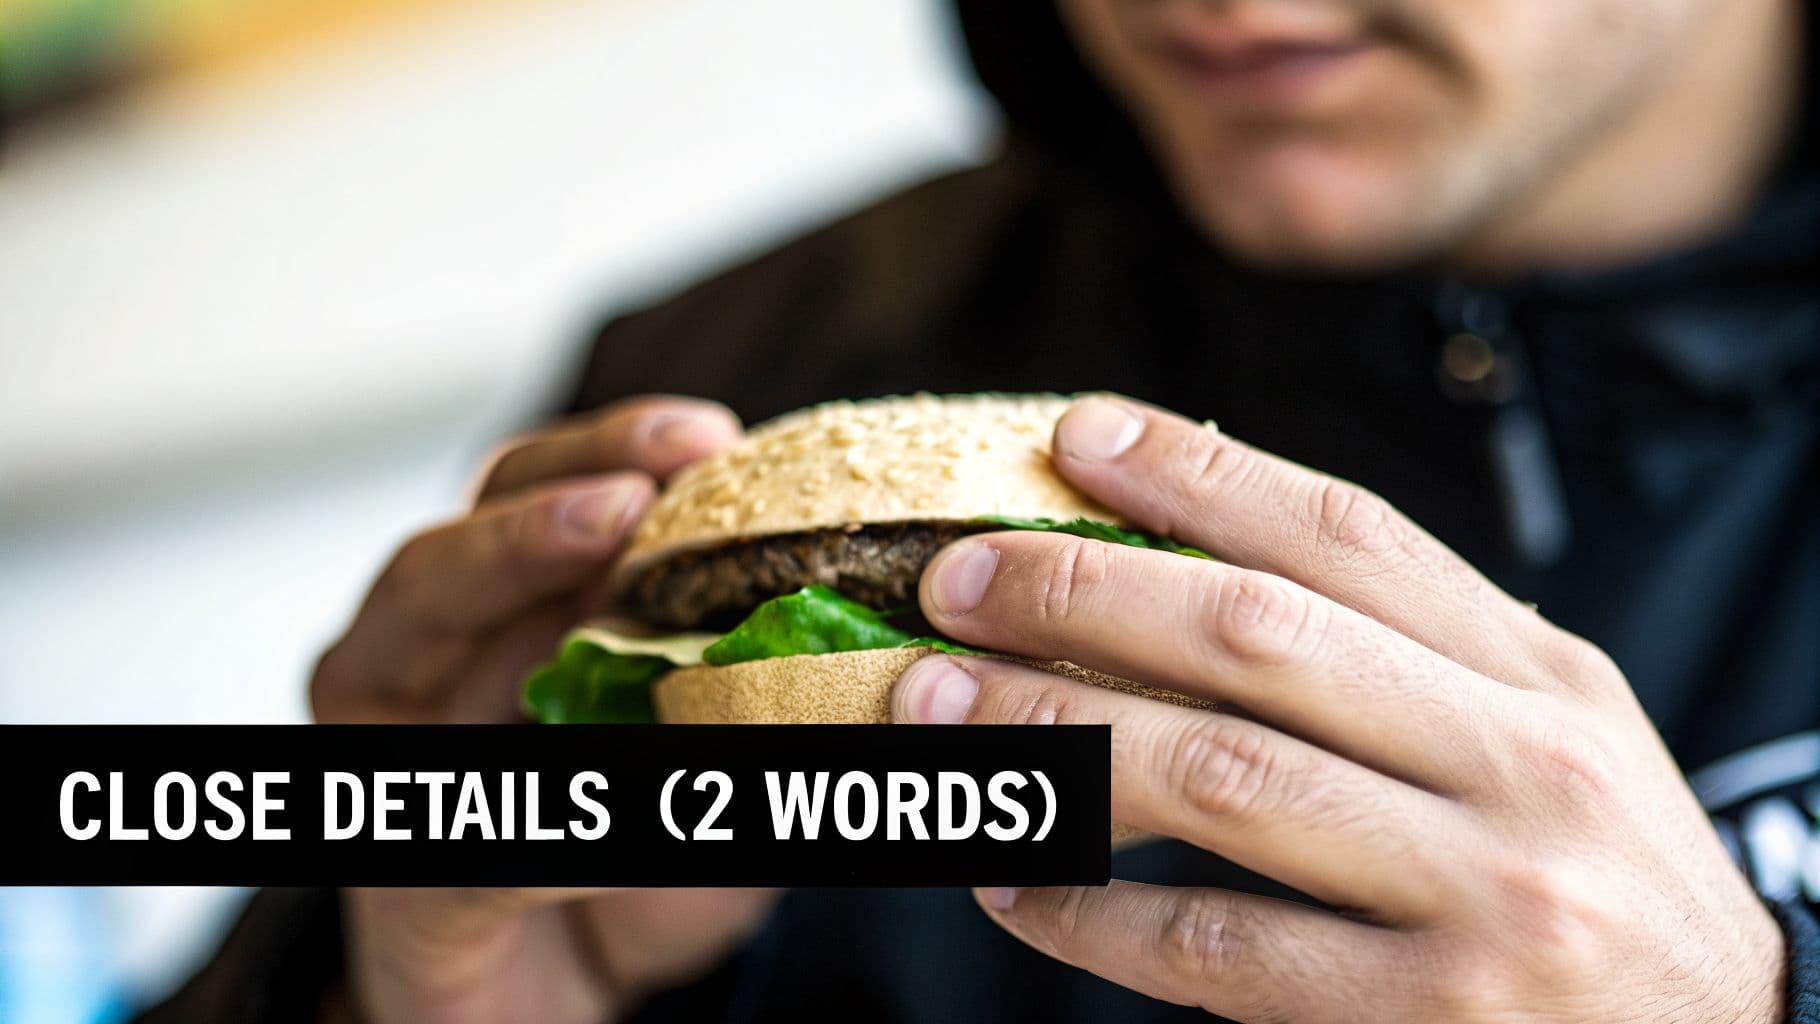
Think of a beauty influencer showcasing the smooth application of a new foundation or a food vlogger capturing the juicy details of a burger. The close-up shot is essential for conveying subtle facial expressions in emotional storytelling and is a non-negotiable for e-commerce ads that need to highlight product quality. It’s the angle that makes your audience feel, see, and almost touch the subject.
Creative Tips for Using a Close-Up Shot
To make your close-ups more compelling, pair them with subtle movements. A slight pan across a product's surface can reveal its texture, while a slow zoom into a person's eyes can build suspense. For social media, quick cuts between multiple close-ups in a montage can effectively show the details of a transformation or the different features of an item. For even more polished visuals, you can use powerful tools to perfect your product shots and other imagery with an AI-powered image editor.
Pro Tip: Use the close-up shot to signal importance. When you cut from a wider shot to a close-up of an object or a facial reaction, you are visually telling your audience, "Pay attention, this matters." It's a classic cinematic technique that works wonders in short-form content.
When to Use This Angle:
- Product Demonstrations: Essential for showing off the quality, texture, color, and key features of an item.
- Emotional Storytelling: Captures subtle facial expressions to convey feelings like joy, sadness, or surprise.
- Food & Recipe Videos: Makes food look more appealing by focusing on textures and ingredients.
- Beauty & Skincare Content: Perfect for showing product application and results on the skin.
- Lip-Sync & Reaction Videos: Focuses on the mouth or eyes to maximize expressive impact.
9. Bird's Eye View Shot (Overhead)
The bird's eye view shot, also known as an overhead shot, positions the camera directly above a scene, looking straight down. This angle creates a unique, map-like perspective that detaches the viewer emotionally and instead emphasizes pattern, organization, and the relationship between objects. It offers a god-like view, revealing the full scope of a setup and making it a powerful tool for visual storytelling and aesthetic compositions.

Popularized by food bloggers and lifestyle creators, this angle turns everyday scenes into a work of art. Imagine a "What's in my bag?" Reel where products are neatly arranged, or a satisfying time-lapse of a desk being organized. The overhead perspective is excellent for tutorials where the arrangement of tools is key, like in makeup application or recipe videos, allowing the audience to see every step clearly from a non-obstructed viewpoint.
Creative Tips for Using a Bird's Eye View Shot
Make your overhead shots more engaging by introducing motion. You can use a time-lapse to show a process unfolding, like a meal being prepared or a painting being created. For product content, use stop-motion animation to make items appear to move on their own, adding a whimsical and captivating quality to your video.
Pro Tip: When shooting flat-lays, pay close attention to lighting. A single, harsh overhead light can create unflattering shadows. Use a large, soft light source (like a softbox or a window with diffused light) placed slightly to the side to create gentle, even lighting that highlights your products' textures and details.
When to Use This Angle:
- Flat-Lay Product Photography: Ideal for showcasing multiple products in a styled, aesthetically pleasing arrangement for Instagram or Pinterest.
- Food & Recipe Content: Gives a clear, top-down view of the ingredients and cooking process, making it easy for viewers to follow along.
- Workspace & Desk Setup Tours: Provides a full overview of a creator's setup, highlighting organization and gear.
- Before-and-After Transformations: Perfect for showing the impact of an organization or cleaning project in a single, powerful frame.
10. Two-Shot
The two-shot is a foundational camera angle that frames two subjects within the same shot, immediately establishing a relationship between them. This angle is all about context, interaction, and connection. By placing two people side-by-side, it tells the viewer their story, whether it's one of partnership, conflict, comparison, or collaboration. It's the visual backbone of interviews, podcast recordings, and any content where dialogue is key.
Think of your favorite YouTube collaboration video or a TikTok trend featuring a couple. The two-shot captures the authentic back-and-forth, the subtle reactions, and the shared energy that a single shot would miss. It makes the audience feel like they are observing a genuine interaction, which is perfect for building credibility in interviews or showing chemistry in relationship-focused content.
Creative Tips for Using a Two-Shot
To make a two-shot more engaging, have your subjects positioned at a slight angle towards each other and the camera, rather than facing straight on. This creates a more natural, conversational posture. You can also use composition to tell a story; placing subjects close together suggests intimacy, while leaving space between them can imply tension or distance.
Pro Tip: When filming an interview, keep the camera rolling on a wide two-shot even when you're capturing single shots of each person. This provides valuable B-roll footage of the listener's reactions, which you can cut to in post-production to make the conversation feel more dynamic and authentic.
When to Use This Angle:
- Interviews & Podcasts: Essential for showing the dynamic between a host and guest.
- Product Comparison Videos: Visually places two items side-by-side for a direct debate or feature analysis.
- Couple & Collaboration Content: Captures the shared experience and chemistry between two creators.
- Coaching & Mentorship Calls: Frames the teacher-student relationship, showing both guidance and response.
Comparison of 10 Camera Angles
| Shot | Implementation 🔄 | Resources ⚡ | Expected Outcomes ⭐📊 | Ideal Use Cases 📊 | Key Advantages 💡 |
|---|---|---|---|---|---|
| Eye Level Shot | 🔄 Low — simple framing, minimal setup | ⚡ Minimal — one camera, tripod, basic lighting | ⭐ Natural, relatable; 📊 steady engagement and trust | Interviews, tutorials, testimonials, vlogs | 💡 Builds trust, highly versatile, easy baseline |
| Low Angle Shot | 🔄 Medium — requires low positioning and composition care | ⚡ Moderate — low tripod/jib; mindful lighting | ⭐ Powerful, authoritative; 📊 high visual impact | Product hero shots, motivational and action content | 💡 Conveys dominance and scale with strong presence |
| High Angle Shot | 🔄 Medium — needs elevated placement and clearance | ⚡ Moderate — ladder/boom or rig, overhead lighting | ⭐ Shows vulnerability and context; 📊 clarifies environment | Before/after, vulnerability scenes, overhead tutorials | 💡 Emphasizes scale/weakness and establishes scene |
| Dutch Angle (Canted) | 🔄 Medium — tilt composition needs balance | ⚡ Low — simple tilt on tripod or handheld | ⭐ Tension and energy; 📊 grab attention quickly | Thriller beats, high-energy Reels/TikToks, transitions | 💡 Creates drama and dynamism—use sparingly to avoid gimmick |
| Over-the-Shoulder Shot | 🔄 Medium — careful subject placement and eye lines | ⚡ Moderate — extra space, lens choice, lighting both subjects | ⭐ Adds depth and context; 📊 improves conversational clarity | Interviews, debates, multi-person reviews, coaching | 💡 Preserves eye lines and interaction flow, more engaging than static wide |
| POV Shot (Point of View) | 🔄 Medium–High — needs realistic movement and framing | ⚡ Moderate–High — body rigs/stabilizers, smooth motion control | ⭐ Immersive and engaging; 📊 strong viewer involvement | Product demos, first-person storytelling, tutorials, VR | 💡 Puts viewer in protagonist’s shoes—very persuasive when smooth |
| Wide / Establishing Shot | 🔄 Low–Medium — framing and location scouting required | ⚡ Low — wide lens, space; may use drone for scale | ⭐ Sets location and scale; 📊 orients audience quickly | Travel intros, real estate, scene transitions, event coverage | 💡 Provides context and scale; pair with closer shots for emotion |
| Close-Up Shot | 🔄 Low — precise framing and focus required | ⚡ Moderate — macro/tele lenses and good lighting | ⭐ Conveys emotion and detail; 📊 high engagement for features | Product detail, emotional beats, beauty and food content | 💡 Highlights texture and expression—requires careful lighting |
| Bird's Eye View (Overhead) | 🔄 Medium–High — needs overhead rigging or drone | ⚡ High — rig/drone, top lighting, careful arrangement | ⭐ Striking, organized compositions; 📊 clear spatial relationships | Flat-lays, food, workspace tours, satisfying arrangement videos | 💡 Offers unique, map-like perspective for pattern and layout |
| Two-Shot | 🔄 Medium — balanced framing for two subjects | ⚡ Moderate — lighting both subjects, adequate space | ⭐ Shows relationships and reactions; 📊 efficient conversational capture | Interviews, collaborations, product comparisons, pair content | 💡 Captures authentic interaction and dynamics without constant cuts |
Turn Your Knowledge into Action with AI-Powered Video
You've just explored a full roster of camera angles, from the commanding Low Angle shot to the intimate Close-Up. Understanding the name of camera angles is the foundational step, but the real power lies in applying this knowledge to evoke specific emotions and guide your audience's perception. Each angle is a tool in your visual storytelling kit, capable of building trust, creating suspense, establishing authority, or fostering a direct connection with your viewer.
The core lesson is that framing is never neutral. A simple shift from an Eye-Level shot to a High Angle can completely change the dynamic between your subject and the audience. A Wide Shot provides context, while a POV shot puts the viewer directly into the action. Mastering these techniques means you are no longer just recording content; you are directing it with purpose and intention.
From Theory to Practical Application
The true challenge for creators, marketers, and brands isn't a lack of ideas but a lack of time and resources to execute them effectively. Manually setting up a Two-Shot for a conversational ad, then re-framing for a dramatic Dutch Angle reveal, and finally capturing a Bird's-Eye-View of a product can consume an entire day. This production bottleneck often forces creators to settle for a single, static angle, sacrificing the dynamic energy that multiple shots provide.
This is where your new understanding of camera work meets modern technology. Instead of viewing each angle as a separate, time-intensive setup, you can treat them as descriptive commands. Imagine simply describing the video you want to create:
- "Start with a Wide Shot of a person at a desk."
- "Cut to a Close-Up of their determined expression."
- "Show a POV Shot of them typing on the keyboard."
- "End with a Low Angle Shot of the finished product on the desk, making it look heroic."
This sequence tells a complete story, moving from context to emotion and finally to a powerful product reveal. Manually producing this short sequence is work. Describing it is easy. With AI-powered tools, that description is all you need to bring your vision to life. By combining your strategic knowledge of each name of camera angles with the efficiency of AI, you can move from concept to finished video in minutes, not hours. This approach allows you to scale your content production, A/B test different visual approaches, and consistently publish videos with the professional polish that captivates audiences and drives meaningful engagement.
Ready to put your knowledge of camera angles into practice without the manual effort? ShortGenius (AI Video / AI Ad Generator) can take your simple text prompts and instantly generate entire video ads and content, complete with strategic camera angles, movements, and voiceovers. Stop just planning your shots and start creating them in seconds at ShortGenius (AI Video / AI Ad Generator).