How to Rotate a Video: Fix Sideways Clips Fast
How to rotate a video - Learn how to rotate a video on any device. Get easy guides for iPhone, Android, PC, Mac, and pro tools. Fix sideways videos quickly, mai
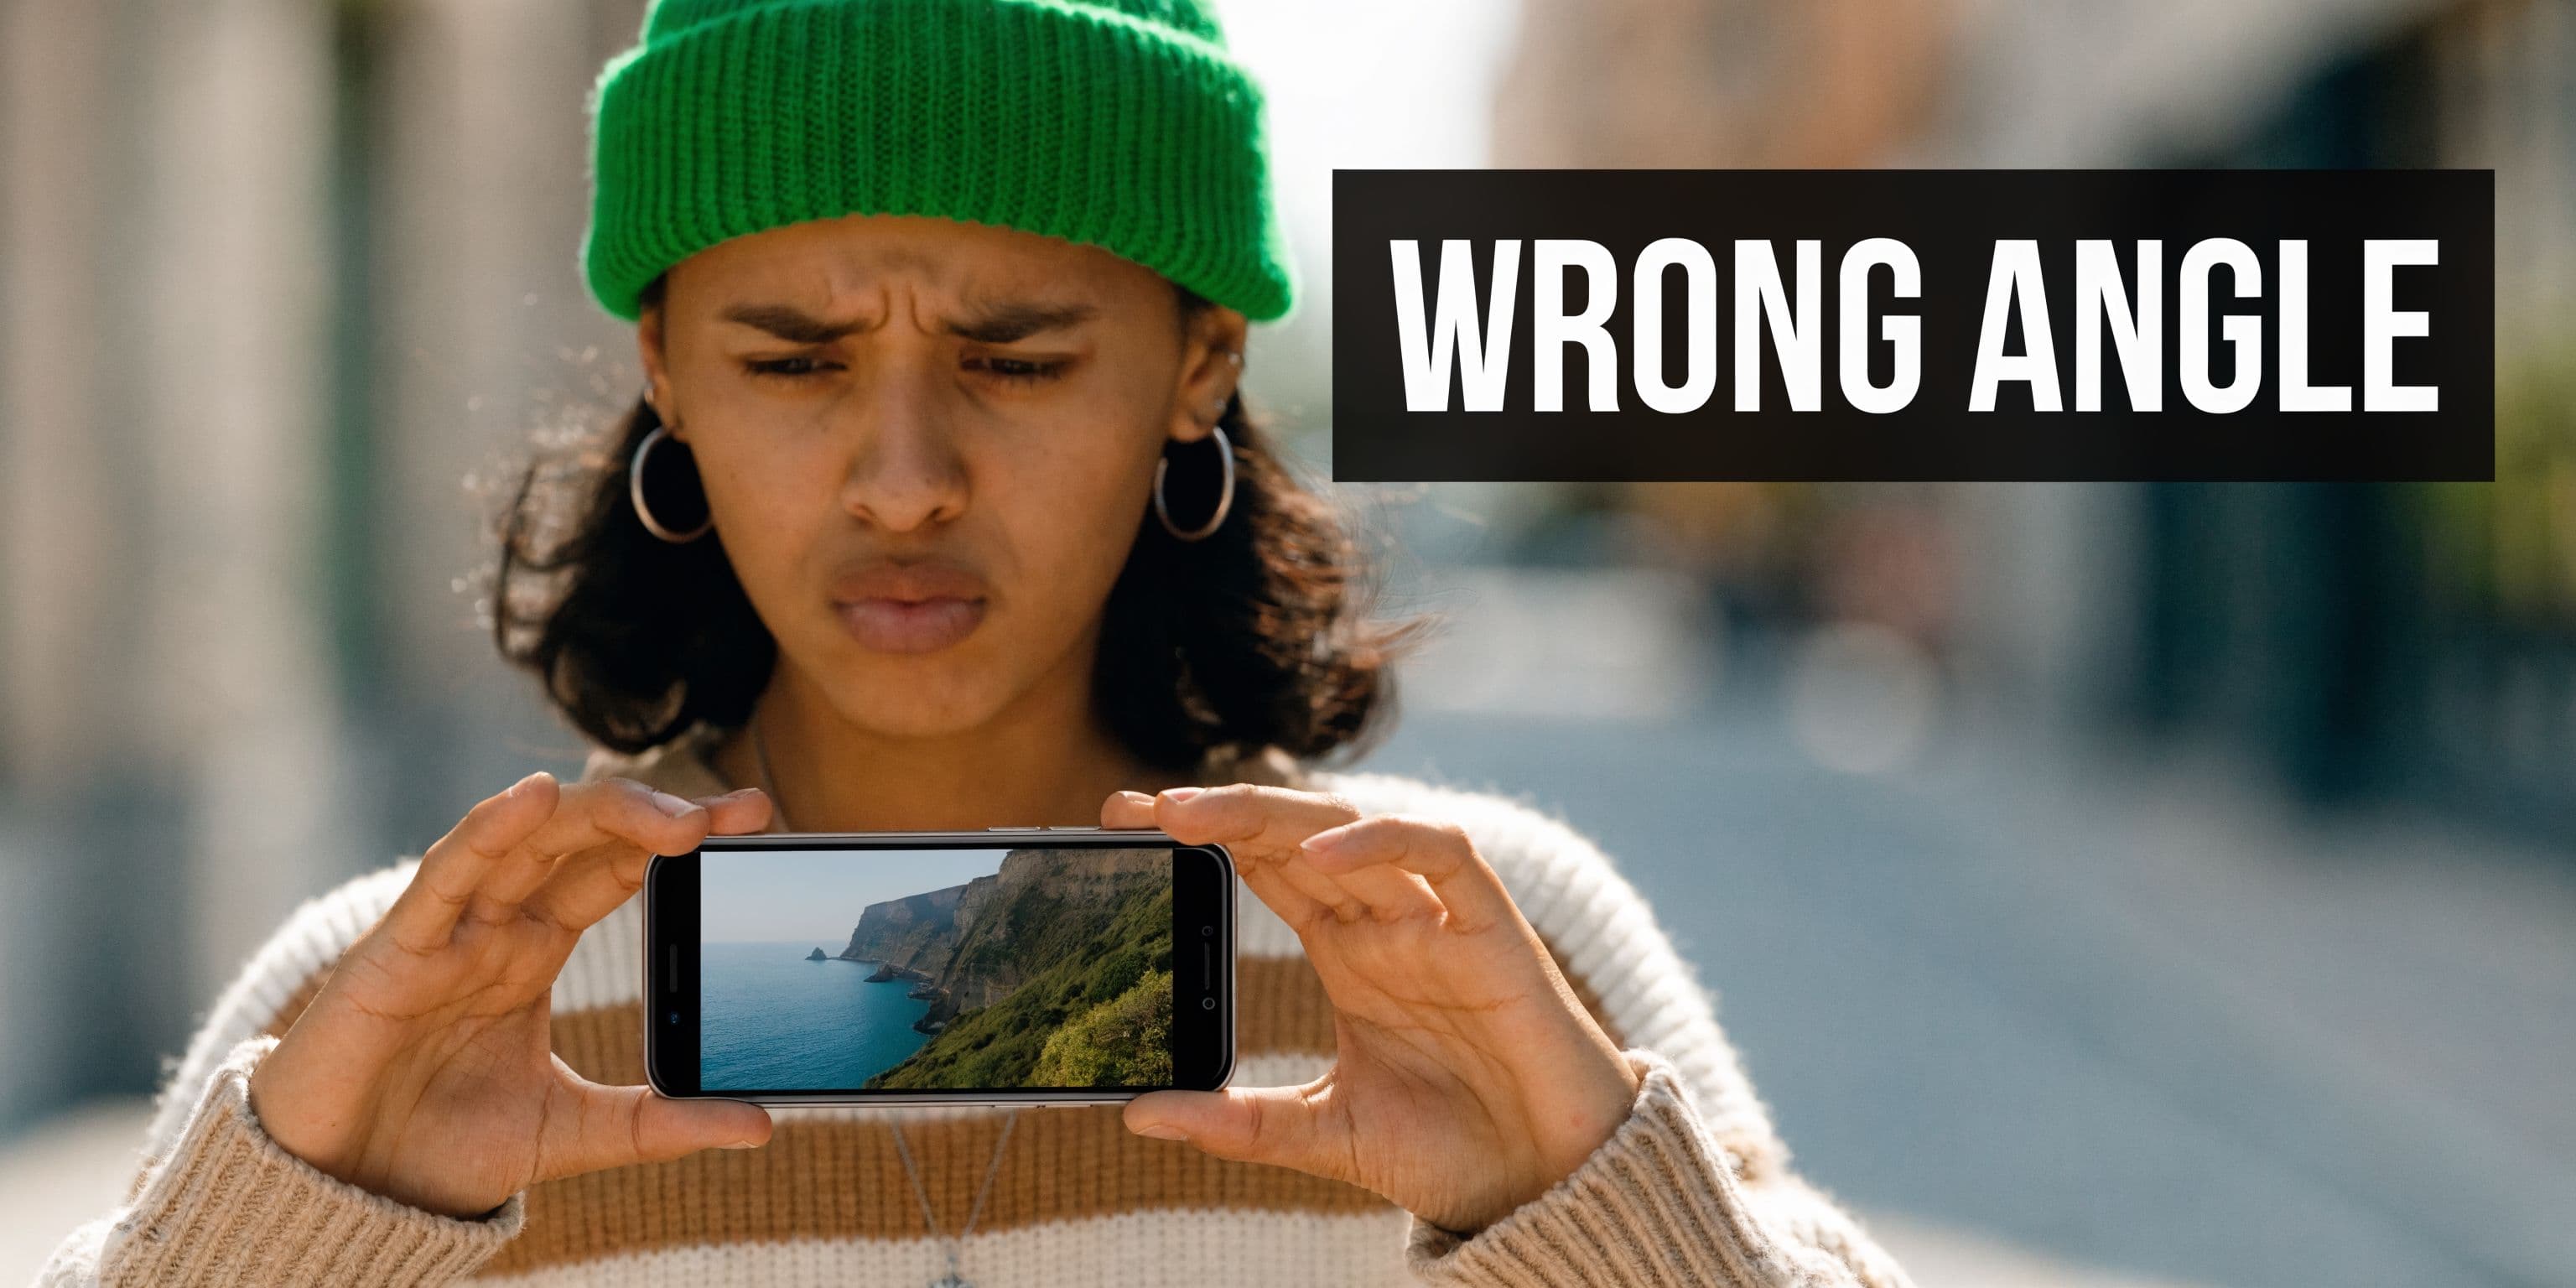
You shoot a great clip. The timing is right, the lighting works, the expression lands. Then you open it and the whole thing is sideways.
That problem is annoying, but it usually isn't serious. Most of the time, you don't need to rebuild the edit or accept quality loss. You just need to choose the right kind of rotation. Sometimes that means a fast metadata fix. Sometimes it means opening an editor and re-framing the shot properly so it looks right everywhere you publish it.
If you only remember one thing from this guide, remember this. Rotating a video is easy. Rotating it without causing black bars, softness, or export headaches presents the key decision.
Why Your Perfect Shot Is Sideways and How to Fix It Fast
A sideways clip usually starts with a tiny mistake that nobody notices while shooting. Your phone was locked to portrait. You turned the camera a split second after hitting record. The orientation sensor guessed wrong while you were moving.
This isn't a new problem. It got much more common when smartphones became the main camera for everyday creators. Historically, video rotation became urgent with the iPhone's 2007 launch, and its orientation sensor frequently produced sideways footage due to accelerometer misreads. Soon after, user uploads exploded, and 52% of videos uploaded to YouTube in 2010 were vertical or misoriented, according to Google's internal data in this reference: video rotation background notes.
The fix depends on what you need next
If you're fixing one family clip, the best tool is usually the one already on your phone or computer.
If you're editing a client ad, social cutdown, or product demo, a quick rotate button may not be enough. You may need to crop, scale, blur the background, or convert the frame from horizontal to vertical.
If you're making short-form content every week, rotation becomes part of a bigger workflow. You aren't just correcting orientation. You're preparing one piece of footage for TikTok, Reels, Shorts, and maybe a standard 16:9 upload too.
Practical rule: If the video is already framed well and only displays the wrong orientation, start with a lossless method. If the framing also needs work, use an editor and re-compose the shot.
What usually goes wrong
A few patterns show up over and over:
- Phone footage imports sideways because one app reads orientation metadata and another ignores it.
- Action camera clips end up upside down because the camera was mounted in a weird position.
- A rotated export looks soft because the file was re-encoded unnecessarily.
- A vertical clip in a horizontal frame grows black bars because rotation changed the orientation but not the composition.
The good news is that all of those are fixable. The bad news is that one-click rotation isn't always the right answer. The right answer is the one that preserves quality first, then fixes framing second.
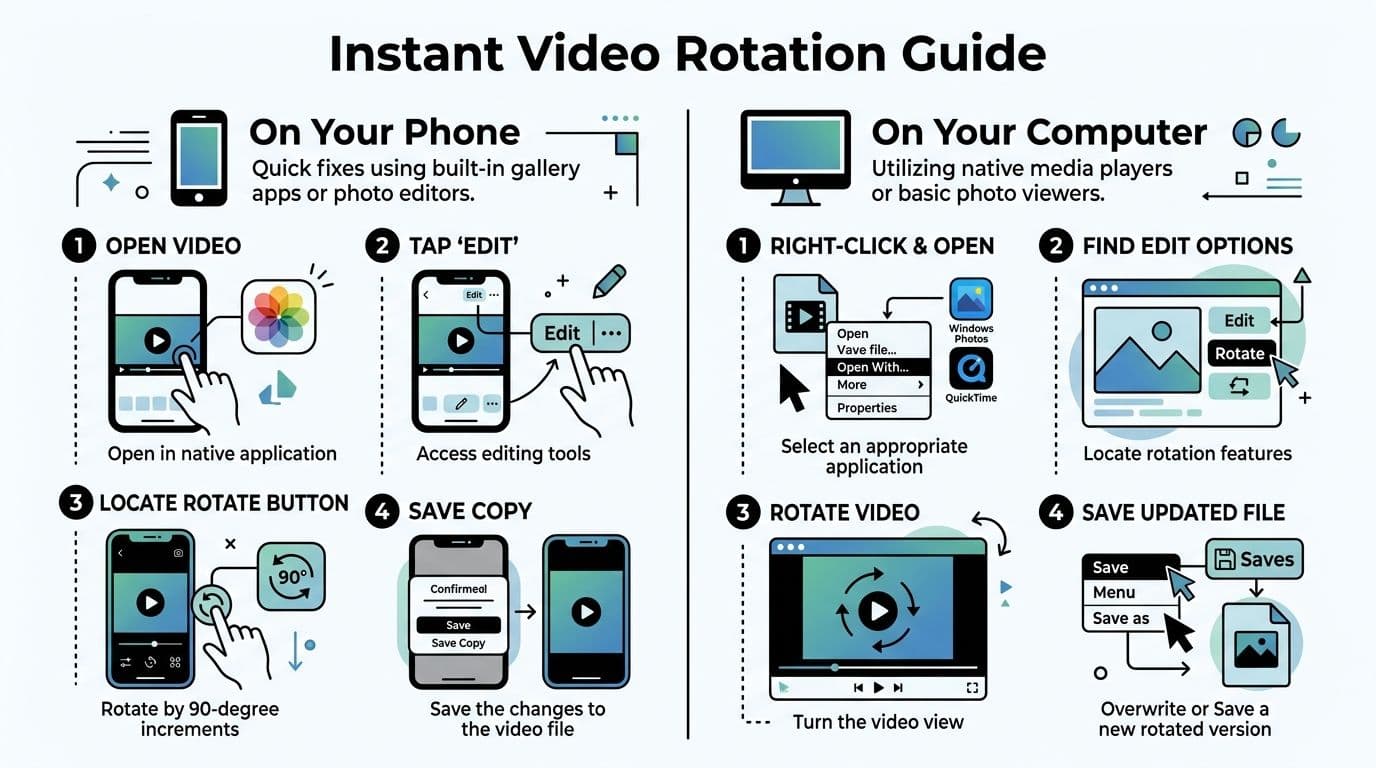
Rotate Videos Instantly on Your Phone and Computer
Most creators should start with the built-in tools already sitting on their device. They're fast, familiar, and usually good enough for straightforward orientation fixes.
On iPhone and Android
On iPhone, open the video in Photos, tap Edit, use the crop and rotate controls, then save. For simple corrections, this is usually the fastest route.
On Android, Google Photos offers the same kind of quick fix. Open the clip, go into editing, find the rotate control, rotate until the frame is upright, and save the corrected version.
These mobile editors are a good first stop because they don't ask much from you. You don't need a timeline. You don't need export presets. You just need the clip upright and shareable.
On Windows and Mac
On Mac, QuickTime Player remains one of the simplest ways to rotate a video. Open the file, then use Edit > Rotate Left or Edit > Rotate Right. It's especially handy for upside-down clips from action cameras or fast one-off corrections.
On Windows, the Photos app gives you a straightforward edit flow for common fixes. If you want another built-in or bundled option, Clipchamp also gives a clean rotate workflow inside a more modern editing interface.
There's another useful distinction here. Many built-in tools rely on a lossless metadata edit instead of re-encoding the whole file. That approach comes from EXIF orientation standards introduced in 1995, and it changes an orientation flag such as "6" for 90-degree clockwise without recompressing the video, which preserves 100% quality. The same reference also notes that Windows Media Player added this capability in 2009, that it was used by many monthly active users, and that QuickTime has long been a go-to tool for the 22% of GoPro videos that are filmed upside-down in the cited material: built-in rotation methods and metadata notes.
Quick tool choice by situation
| Situation | Best first tool | Why it works |
|---|---|---|
| One sideways phone clip | Photos or Google Photos | Fast and simple |
| One upside-down camera file on desktop | QuickTime or Windows app | Minimal effort |
| Several clips for a short edit | Clipchamp | Easier batch handling |
| Social post needs text, cuts, and reframing | Editor, not just a rotate button | You need composition control |
When built-in tools are enough
Use them when:
- The orientation is the only problem. The content already fits the frame.
- You want to preserve quality. Metadata-based fixes are ideal for this.
- You need speed. These tools are often a matter of taps or clicks.
Don't use them when:
- The clip still looks awkward after rotation. A rotated horizontal shot may still look bad in vertical format.
- You need animated text, captions, or crops. That's editing, not just rotation.
- Different platforms need different versions. One corrected file may not be enough.
If your next move after rotating is adding captions, trimming dead air, or resizing for a vertical feed, stop using a viewer app and switch to an editor.
If you're publishing short-form regularly, it also helps to know which lightweight editors are worth keeping on your phone. This roundup of best video editing apps for TikTok is useful when the built-in app feels too limiting but you still want a fast mobile workflow.
The mistake people make here
They rotate, hit save, and assume they're done.
Then they upload the file, and the platform crops it strangely or adds bars. The rotation itself may be correct. The frame design isn't. That's the moment to move from quick correction into editing.
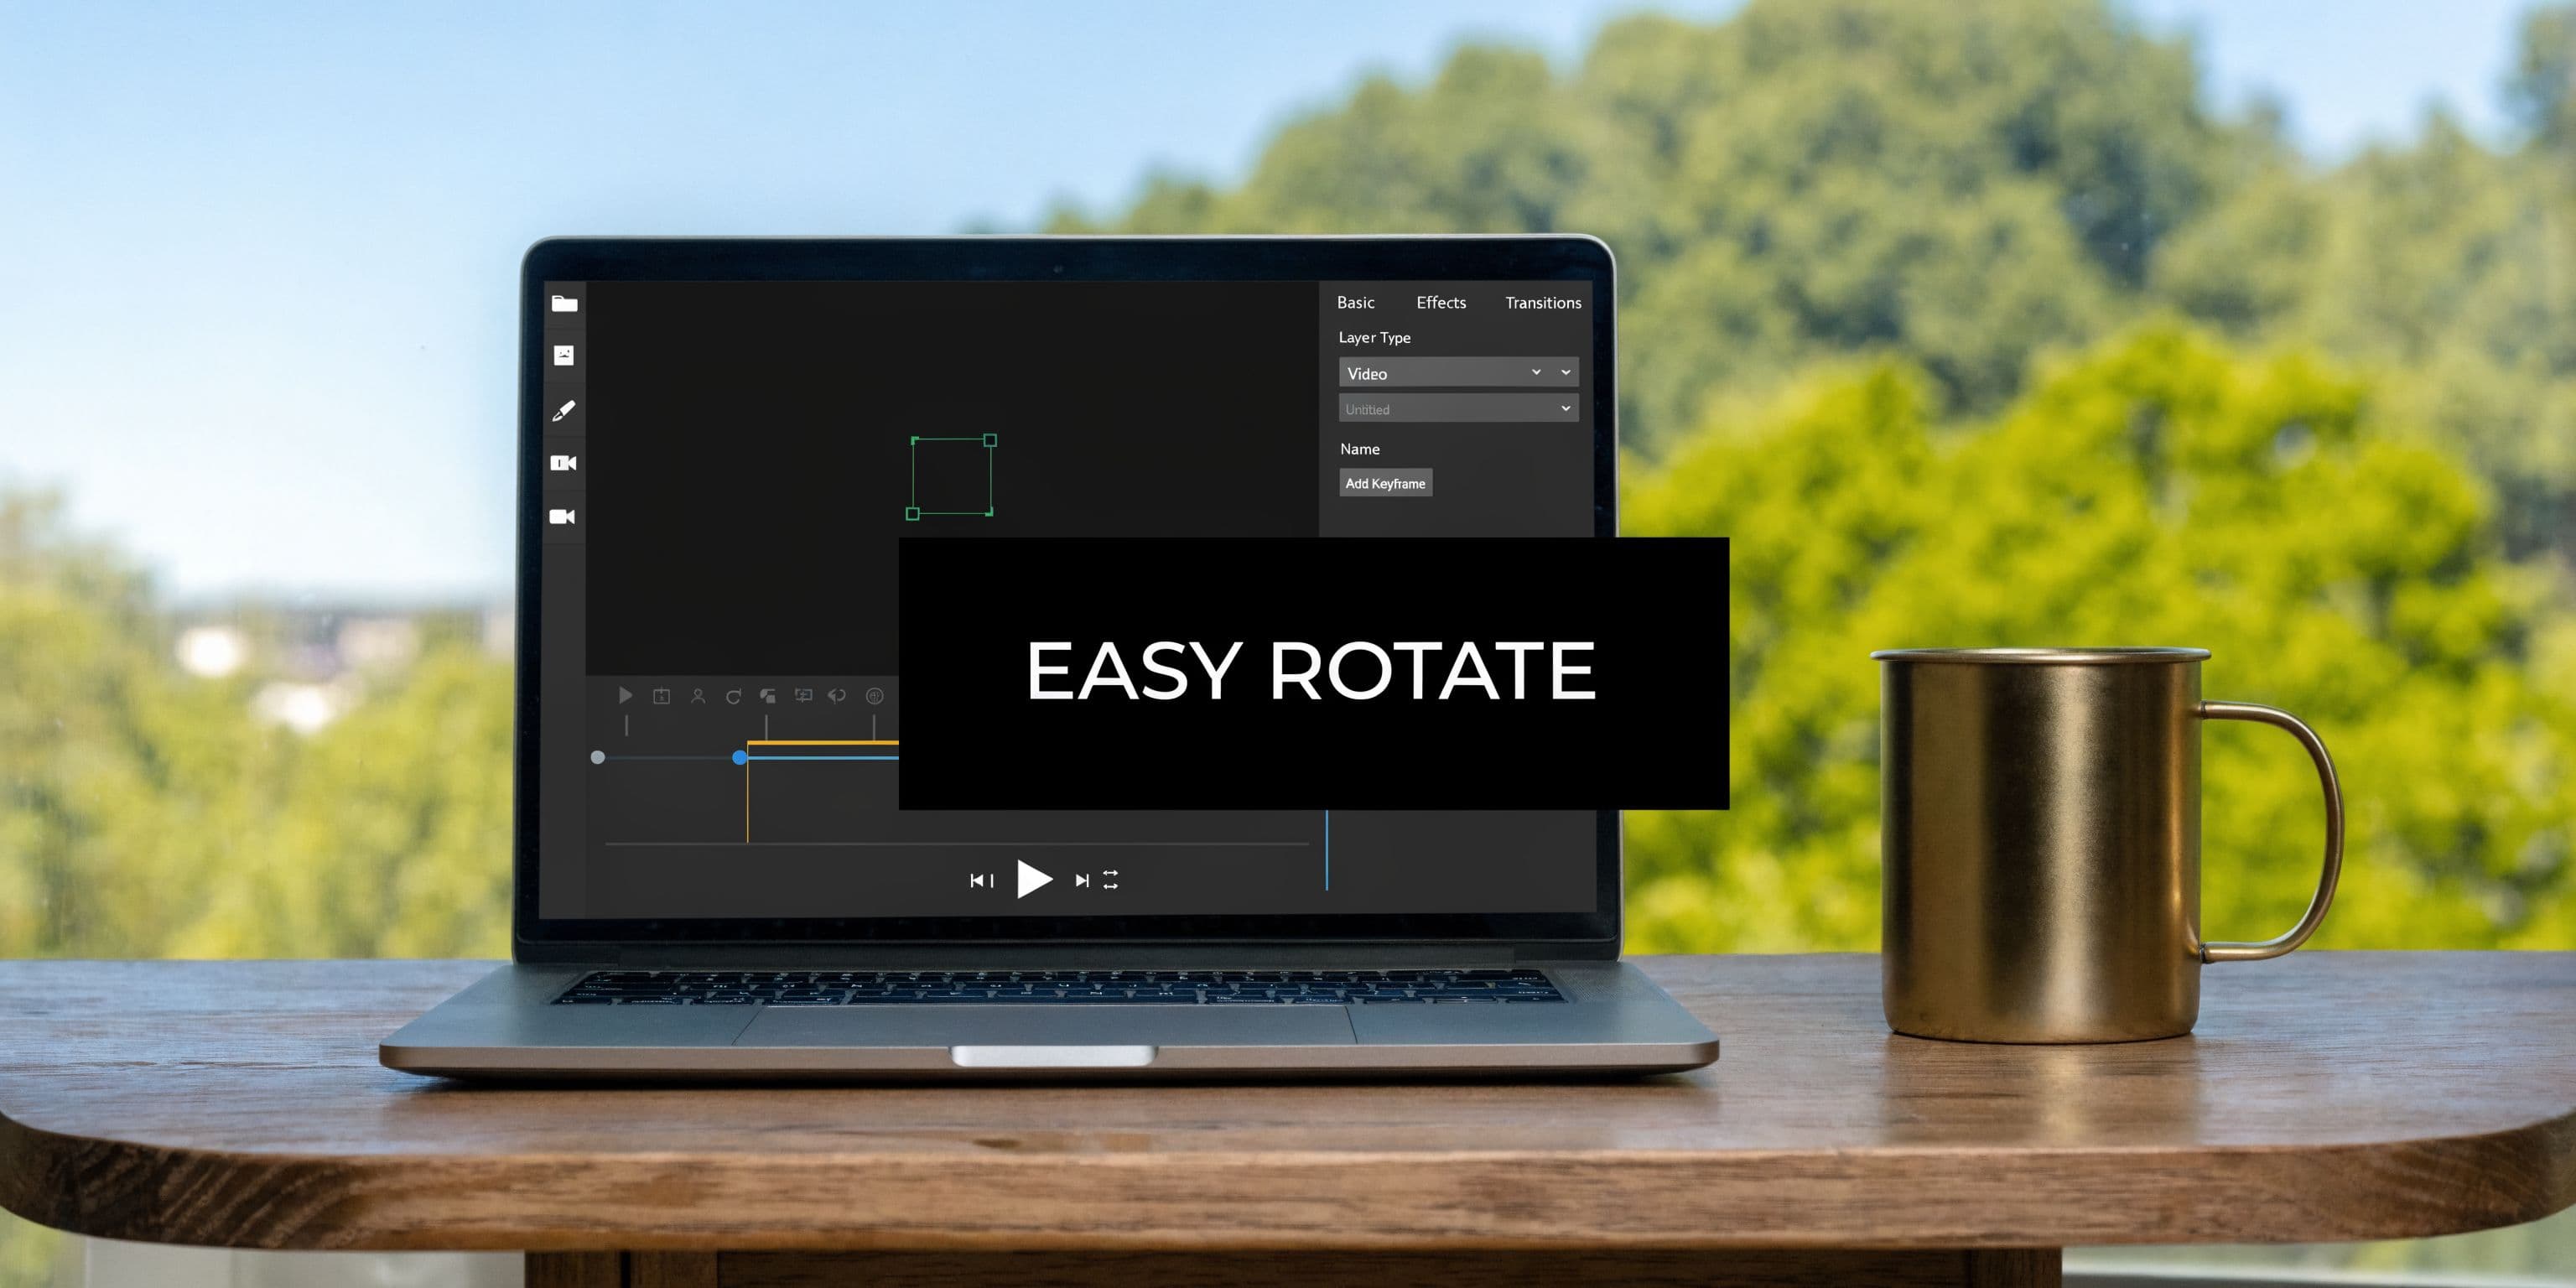
Effortless Rotation and Resizing with ShortGenius
You fix the sideways clip, export it, upload it, and then a problem appears. The subject is cropped wrong in vertical, the captions sit too low, or the platform adds empty space that makes the video look amateur.
That is why rotation should be handled as part of the full edit, not as an isolated fix. Once a clip needs to work in 9:16, 1:1, and 16:9, the job shifts from correcting orientation to protecting composition and export quality.
A tool like ShortGenius for multi-format video creation helps because rotation sits next to resizing, reframing, captions, and scene changes in the same workflow. That cuts down on repeated exports and reduces the odds of introducing softness or black bars by bouncing the file through multiple apps.
The quality trade-off matters here. If a phone or desktop app can solve the problem with a metadata-based rotation, use that first. But if the frame still needs to be rebuilt for Shorts, Reels, or TikTok, a proper editor is the safer choice because you can rotate, crop with intent, and export once for the target format instead of stacking conversions.
Rotation matters most when resizing changes the frame
A horizontal interview turned vertical is a common example. After rotation, the speaker may sit too far to one side, lower-third graphics may fall out of frame, and captions that worked in 16:9 may cover the mouth in 9:16.
That is not a rotate-button problem. It is a composition problem.
Inside a unified workflow, the better order is:
- Fix the orientation so the clip is upright.
- Set the target aspect ratio for the platform.
- Reframe the shot so faces, products, or action stay centered.
- Add captions and graphics after the frame is final.
- Export the delivery version once to avoid unnecessary re-encoding.
That sequence saves time, and it protects quality. Every extra export is another chance to lose detail, crush fine text, or create uneven scaling.
Where an all-in-one workflow earns its keep
This pays off fast for teams repurposing the same source footage into several deliverables. A podcast clip may need a vertical short with burned-in captions, a square promo for social, and a clean widescreen version for YouTube. A product demo might arrive from different contributors in mixed orientations and inconsistent framing.
In those cases, rotation is only the first correction. The major benefit is keeping the file in one editing pipeline so you can fix orientation, resize with control, and publish versions that look intentional instead of patched together.
That is the difference between a clip that is merely upright and one that is ready to post.
Precision Control with Pro Tools and FFmpeg
A phone-recorded clip that is only a few degrees off can look worse after a quick rotate than it did sideways. Horizon lines drift. Corners show. Text overlays stop sitting square. That is where pro tools earn their keep, because they let you correct orientation with control instead of forcing a blunt 90 degree turn.
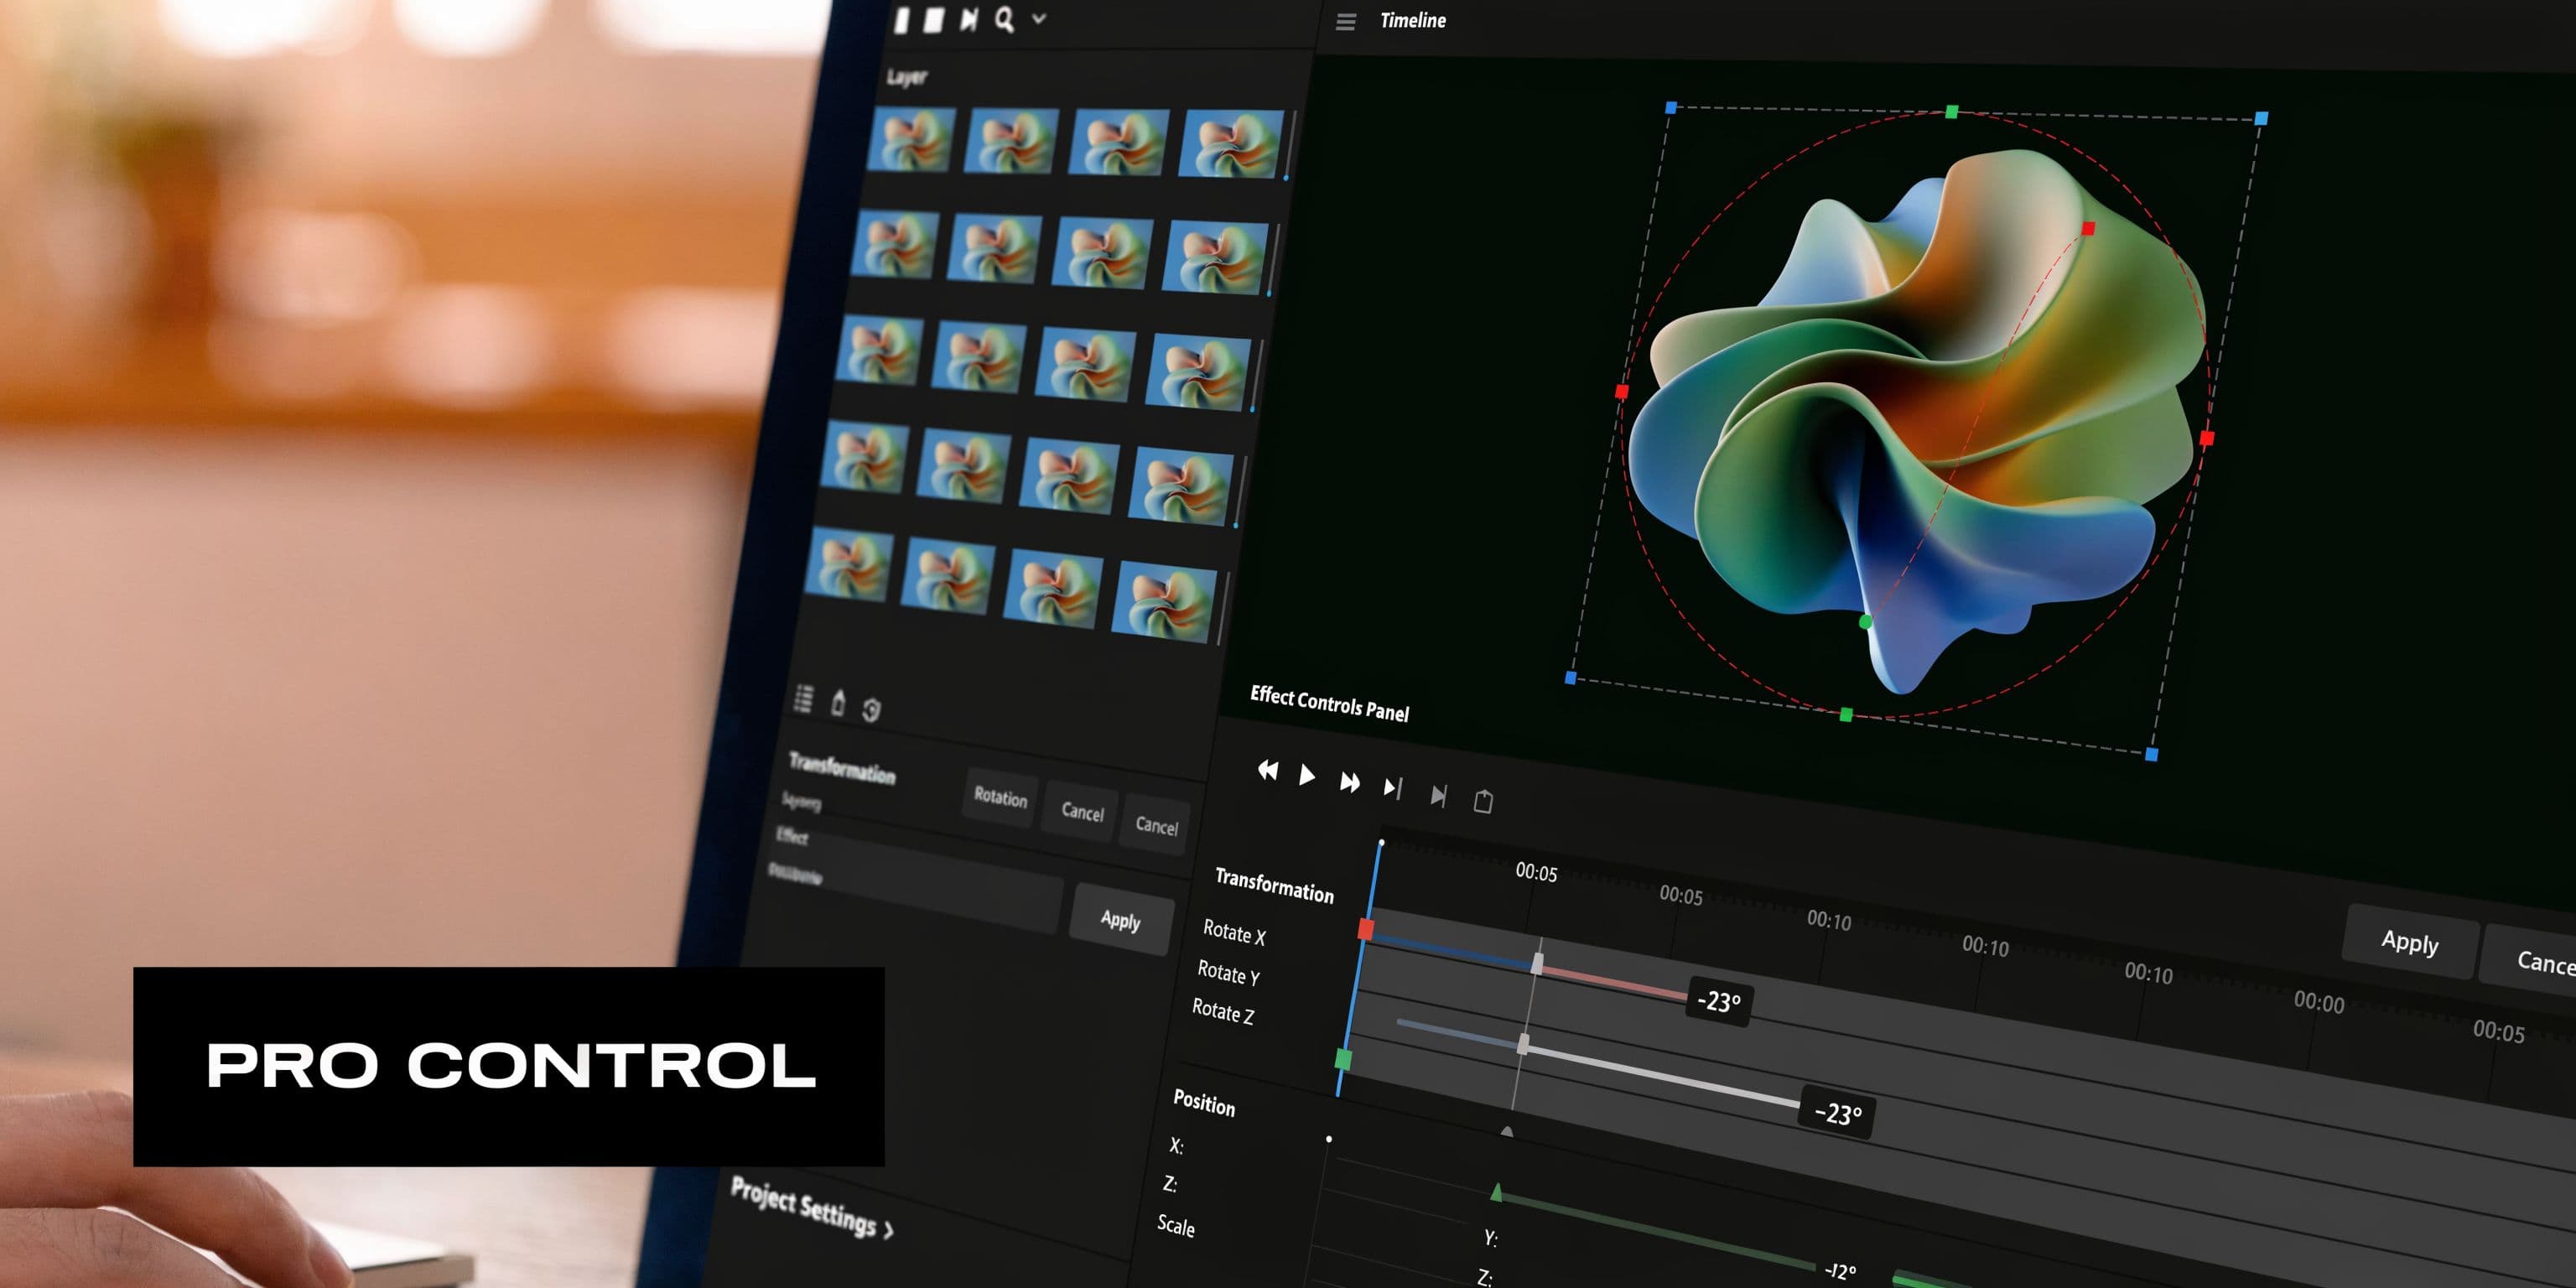
In Premiere Pro and Resolve
In Adobe Premiere Pro, rotation lives under Motion in Effect Controls. In DaVinci Resolve, you will usually use the Inspector or Transform controls. The panels differ, but the job is the same. Rotate, then check framing, then decide whether the clip still deserves a full export or just a metadata fix elsewhere in your workflow.
A reliable workflow looks like this:
- Select the clip in the timeline.
- Adjust Rotation until the image is level, not just close enough.
- Reposition and scale to keep the subject framed well.
- Check the edges at full screen before exporting, especially if the shot has text, straight lines, or product packaging.
If you want movement, add keyframes. That is useful for a deliberate spin, a subtle tilt, or a correction that changes over time because the camera operator drifted during the shot.
Use the lightest fix that preserves quality
The right tool depends on what kind of rotation problem you have.
If the file is tagged with the wrong orientation and the pixels are already fine, a metadata-based correction is better because it can avoid re-encoding. If the image itself needs a true visual rotation, such as a slight angle correction or a creative tilt, you will need to render new frames. That is where quality can drop if export settings are sloppy.
I treat rotation as a quality decision first, not just an editing task. Every full re-encode is another chance to soften detail, add banding, or make compression artifacts more obvious. Export once if possible. Match codec, bitrate, and frame rate carefully if you need to deliver a new file. This guide to the best video format for quality and compatibility is a good refresher if you are cleaning up footage for several platforms.
Clipchamp and similar tools sit in the middle
Sometimes a full NLE is overkill, but a basic photo app is too limited. Tools in the middle work well for quick manual correction when you need more than fixed quarter turns and less than a full edit session.
That includes workflows where you rotate first, then pass the asset into a broader content pipeline. If you are pairing orientation fixes with graphics or visual cleanup, a tool for image editing and creative asset prep can help keep supporting assets consistent with the final frame.
The trade-off is simple. Free-angle rotation gives more control, but it also exposes edges faster. The more you tilt, the more carefully you need to judge composition and export settings.
FFmpeg for speed and automation
If you process large batches, FFmpeg is hard to beat. It is fast, scriptable, and predictable once you know exactly what correction the files need.
For a standard clockwise rotation with re-encoding, a common command looks like this:
ffmpeg -i input.mp4 -vf "transpose=1" output.mp4
For counterclockwise rotation:
ffmpeg -i input.mp4 -vf "transpose=2" output.mp4
For upside-down correction:
ffmpeg -i input.mp4 -vf "transpose=2,transpose=2" output.mp4
Why editors keep FFmpeg around:
- It batches cleanly across many files.
- It fits scripts and automations.
- It gives exact control over filters, codecs, and output settings.
Its weak spots are just as real:
- No visual preview
- Easy to export with the wrong codec or bitrate
- Poor fit for one-off reframing decisions
For known, repeatable fixes, FFmpeg saves serious time. For clips that need judgment calls about framing, graphics, or edge cleanup, Premiere Pro or Resolve is the safer choice.
Avoiding Black Bars Quality Loss and Other Headaches
Rotation mistakes usually get fixed in seconds. Significant problems appear on export.
A clip can look upright and still be wrong for the job. You see black bars, soft detail, or an upload that flips back sideways on another app. Those are usually framing, codec, or metadata problems.
Black bars come from a frame mismatch
Rotation changes orientation. It does not automatically fix aspect ratio.
That distinction matters. A vertical clip placed in a horizontal frame leaves empty space on the sides. A horizontal clip forced into a vertical frame leaves space above and below, or it has to be cropped harder than you expected. Video teams run into this constantly when repurposing one master clip for YouTube, Shorts, Reels, and presentations.
The clean fix depends on the shot:
-
Scale and crop Best when the subject has safe space around it and losing some edge detail will not hurt the shot.
-
Use a blurred or designed background Useful for interviews, webinars, and archive footage that does not survive an aggressive crop.
-
Leave the bars intentionally Fine for internal review, training decks, or footage where preserving the full frame matters more than presentation.
A quick rule I use. If the crop cuts into hands, text, or headroom, stop scaling and switch to a background treatment instead.
| Problem | Best fix | Trade-off |
|---|---|---|
| Small empty corners after a slight rotation | Scale up slightly | Minor crop |
| Horizontal source for a vertical post | Blur background or crop | Full frame preserved or tighter composition |
| Vertical source in a horizontal player | Pillarbox or redesign layout | Empty side space or extra design work |
Quality loss usually starts with the wrong kind of fix
If a file is only tagged with the wrong orientation, a metadata correction is the safest option because it does not recompress the image. Full export should be reserved for clips that need pixel-level changes.
Re-encoding makes sense in specific cases:
- You need a new frame size
- You need to crop, resize, add titles, or clean edges
- You need a different delivery format for upload or handoff
Every extra export is a chance to lose detail, especially with already compressed phone footage. That is why the first question is not "how do I rotate this?" but "can I fix this without touching the pixels?"
If you do need a fresh export, codec and container choice matter as much as the rotate step. This guide to the best video format for quality and compatibility is a useful reference before you render a final file.
Why one app shows it correctly and another does not
Some apps read rotation metadata. Others ignore it. Some social platforms rewrite files on upload and flatten the result their own way.
That is why a clip can look correct in your gallery, wrong in a messaging app, and correct again after import into an editor.
Use this rule:
- For personal storage or quick internal use, a metadata fix is often enough
- For client delivery, cross-platform posting, or paid campaigns, export a physically corrected file
That second route takes longer, but it removes surprises.
Batch fixes save time. They do not replace judgment.
If ten clips from the same camera rig all came in upside down, batch rotation is efficient. If each clip needs different reframing, manual review is still the safer call.
Batch tools work well when all files need the same quarter turn and no crop decisions. Manual edits are better when headroom changes shot to shot, lower-thirds sit near the edge, or the rotated frame needs cleanup. If you are also rebuilding thumbnails, background plates, or companion visuals around the new framing, a dedicated image editing workflow for supporting assets helps keep everything aligned with the final export.
The short version is simple. Use the least destructive fix first. Re-encode only when framing, compatibility, or design demand it.
From Sideways to Standout Your Next Steps
A sideways clip feels like a small mistake, but the fix you choose affects quality, framing, and how much work comes next.
If you need a quick correction, use the built-in tools first. They work well when the video is already composed properly and just needs the orientation fixed.
If you need precise framing, creative motion, or platform-specific versions, move into an editor. That's where you can rotate, crop, scale, and make the shot feel intentional instead of merely corrected.
If you handle lots of files, FFmpeg is worth learning. If you publish across several channels, the smarter move is to stop treating rotation as a one-off repair and treat it as part of the content workflow.
A good next step is building from one source clip into several polished outputs. If you're creating social content from generated visuals or still assets too, image to video workflows can help turn those raw ingredients into publishable pieces faster.
The practical takeaway is simple. Start with the least destructive fix. Move to full editing only when the composition, export, or platform needs demand it.
Frequently Asked Questions About Rotating Videos
Does rotating a video reduce quality
Not always.
If the tool is only changing orientation metadata, the video can keep its original quality because the file isn't being recompressed. If you export a new file from an editor, quality can change depending on your codec and export settings.
Why does my video still upload sideways
Usually because one app read the orientation metadata correctly and the upload destination didn't. If that keeps happening, export a newly corrected file instead of relying on metadata alone.
Should I rotate before or after editing
For most jobs, rotate first. Then crop, resize, caption, and finish the layout. That keeps every later choice aligned to the final frame.
What's the best tool for one quick fix
Use your phone's Photos app, Google Photos, QuickTime, or a simple desktop editor. If the problem is only orientation, the simplest tool is usually the best one.
What's the best tool for repeated content production
Use something that handles rotation as part of a bigger workflow. Once you're publishing to multiple platforms, the bottleneck isn't the rotate button. It's everything that follows it.
ShortGenius brings all of that into one place. If you want an easier way to turn raw clips, ideas, images, and scripts into polished short-form content, try ShortGenius (AI Video / AI Ad Generator). It helps creators and teams produce, edit, resize, caption, and publish faster without stitching together a pile of separate tools.